
Animated GIFs have made a resurgence thanks in large part to tumblr. Here’s a tutorial that will take you step-by-step through how to create an animated GIF in Photoshop 5.
Here’s a preview of the GIF we will create, using three photos taken at the 2011 Iowa-Northwestern football game.

1. Download the file we will use to make this. It is a PSD document that includes three layers – one for each of the three photos of the stadium. If you are using your own photos, simply put them all in one file and make sure each photo is in its own layer.
2. Open the file in Photoshop.
3. The first thing we need to do is line up the layers. I took all three photos at different times, so they don’t line up perfectly. To do this, first select all three layers in the layers window (click on one and then shift-click on the others).

4. Click on the Edit menu at the top of the screen and then click on Auto-Align Layers. In the next screen, make sure Auto is checked and click on OK.

Photoshop will now find similar parts of the three photos and line them up correctly. Your resulting document will look something like this:
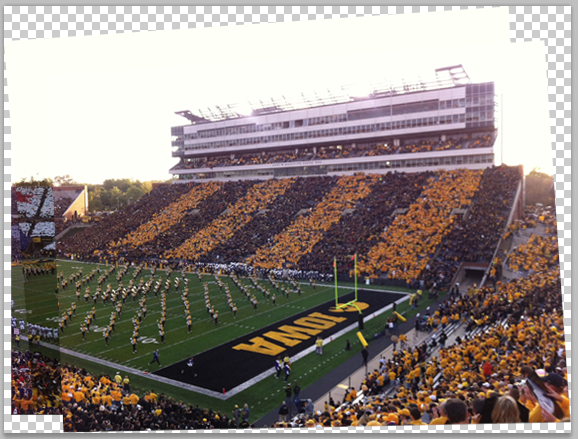
You’ll need to crop in on the photo to get rid of the extra transparency. If I would have done a better job lining up the images when I took the photos, I wouldn’t need to crop away so much of the photos. Click the eyeballs in the layers window to look at each layer one at a time to make sure you have cropped in far enough.
5. Click on the Window dropdown menu (top of the screen) and then on Animation. You will see this window pop up:

If your window looks different, click on the button at the bottom right to switch to “frame animation” mode.
6. Click the dropdown menu at the top right of the animation window, and select “make frames from layers.” You’ll now see two more frames appear:

7. Use the dropdown menu below each photo to determine how long that frame will be shown. And where it says “Once” above, click to choose “Forever.” This will make our animation repeat continuously.
Click the play button to preview your GIF.
8. Now it’s time to save your GIF. At the top of our screen click on File > Save for Web & Devices.
Choose the GIF format and 256 colors. You can leave all of the other settings to their default. Click on Save.

In the next widow, make sure you select “images only” and click on save again.
9. Your GIF is now saved. Drag it into your favorite web browser to see how it looks. Or upload it to tumblr or any website (Note: GIFs don’t work on Facebook).
Enjoy! Let me know if you have any questions. If you make a GIF of your own, please leave a link to it in the comments area below.